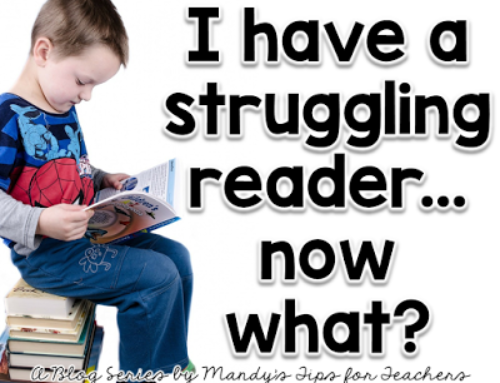
This lesson is my ABSOLUTE favorite and I make sure to teach it every year. I love how it makes an abstract, long and boring topic into an engaging, hands on activity.
My favorite.
I only wish I could take credit for it!
A few years ago I found a lesson on Proteacher on how to use Play-Doh to model the writing process and what is required in each step of the writing process. The original poster of the idea was trexteach. Click here to see the post with the lesson included. You must be a member to download the lesson, but it is free. I HIGHLY recommend joining the site for all the wonderful, FREE resources teachers offer freely.
For this lesson I tell students to brainstorm a new creature that has NEVER been seen before. I ask them to think about what it looks like, what it does, what it eats and so on. Then I related this to the brainstorming or prewriting portion of the writing process. I defined this step on the anchor chart. I create the anchor chart with the students and add the cute pictures when they are messing with the play-doh. 🙂
Then I let students choose one small container of play-doh. This pack was about $15 at Wal-Mart for 24 tubs AND a paper plate. This is important for later!
Before letting students go wild I tell them they MUST pull off a small ball and set it own the lid of their tub. It is off limits and can not be used until I say.
Then I bring them back to the back to the carpet and explain that we will now be drafting our creature. When we draft the creature that means we are building the basic shape and getting our ideas molded to life. Just like when writing, we draft to get our ideas down. They may only USE THEIR play-doh. No sharing of colors. Then I send them back to their seats to draft their creature ON the paper plate.
After a few minutes of building I call students back to the carpet. I explain we are going to revise the creature or make changes to the creature. We do this to make the creature more interesting to our audience. One way to do this is to add to our creature, just like when we write we may add details to our story. Students can use other children’s colors by sharing and pinching off pieces from the small ball sitting on the lid from earlier. I also encourage the students to add details using their pencils.
After a few minutes of work time, I call kids back to the carpet. This is the part they hate! I explain revision is more than adding details, it can also be taking away unnecessary details that do not make the creature or story interesting. They have to take away SOMETHING off their creature and set it off the plate. See, told ya hey hate this!
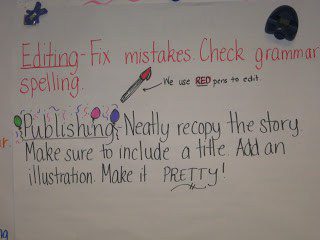
Then I call students back to the carpet and explain that we are going to edit our creatures. This means that we fix any mistakes. It could be an arm that is too short or is about to break off.
For the final step, publishing, I ask students to write the title of the creature on the paper plate and clean up an play-doh scraps. I relate this to neatly recopying the draft and adding a title to the draft if the student had not done that yet.
Then I make sure every student’s name is write dark and in view (that what all the black smudges are- names. I blacked them out for student privacy) and photograph each plate. Then, at a later date, students tape the photograph into their writer’s notebooks and write a story about their creature!
They LOVE it and really GET the writing process.
I am going to make sure to finish posting pictures from my classroom AND answer Guided Reading FAQs sometime soon. If you would have a question about guided reading please click on the picture below and leave a comment. I will try to address it in my post!
Mandy Gregory is a 2007 and 2012 Teacher of the Year. She has taught Kindergarten- 4th grades in both the general education and inclusion settings. She is currently a 1st grade Special Education teacher. She is the owner and creator of Mandy’s Tips for Teachers website (www.mandystipsforteachers.com) and has over 13 years of teaching experience. She is married with two beautiful children.


Love this! I wonder if my 6th graders would like that or if it's too young for them… Actually they would prob love to play with playdoh! Thanks for the lesson idea!
Love this! Thanks for sharing 🙂 Pro teacher was my go to place before I discovered blogging. Wonderful ideas there too!
What a great lesson! I can't wait to use it! Thanks for sharing!
Pixy Stix and Teacher Tricks
Love this! Thanks for sharing!!! I can't wait to try this with all of my fourth graders this year! 🙂
This is the most amazing, creative lesson for teaching the writing process! I absolutely love it and can't wait to use your lesson in my classroom!
Lisa
Stories from Room 114